GR-D231US Quantity: 1
$4.99
» View Details
ZH6022B Quantity: 1
$4.99
» View Details
11524 Quantity: 1
$4.99
» View Details
XVM565BK Quantity: 1
$4.99
» View Details
MD20X Quantity: 1
$4.99
» View Details
CDM7859R Quantity: 1
$4.99
» View Details
CT27G13W1 Quantity: 1
$4.99
» View Details
KEH6050 Quantity: 1
$4.99
» View Details
TM-2703U/RA Quantity: 1
$4.99
» View Details
DVW709WSP Quantity: 1
$4.99
» View Details
CT9828/CSUU40HB Quantity: 1
$4.99
» View Details
GK5040002 59O Quantity: 1
$4.99
» View Details
SCPM71SD Quantity: 1
$4.99
» View Details
LCX50 Quantity: 1
$4.99
» View Details
AWV425 Quantity: 1
$4.99
» View Details
GSI 4745/1 CW-SW Quantity: 1
$4.99
» View Details
HFC111/02 Quantity: 1
$4.99
» View Details
DCD3 Quantity: 1
$4.99
» View Details
S-DVR9SW Quantity: 1
$4.99
» View Details
ACE184XM0 Quantity: 1
$4.99
» View Details
DCSTS750 Quantity: 1
$4.99
» View Details
AQV09BDME Quantity: 1
$4.99
» View Details
LCD-TV3000 Quantity: 1
$4.99
» View Details
GKA 1411 Quantity: 1
$4.99
» View Details
PR603C Quantity: 1
$4.99
» View Details
CDXF50M Quantity: 1
$4.99
» View Details
GSF BOLERO Quantity: 1
$4.99
» View Details
KEH-P6900R/XN/EW Quantity: 1
$4.99
» View Details
FAV50839W Quantity: 1
$4.99
» View Details
RA71G0 Quantity: 1
$4.99
» View Details
TC-KB820S Quantity: 1
$4.99
» View Details
TC-15PM50K Quantity: 1
$4.99
» View Details
DPA 261/G Quantity: 1
$4.99
» View Details
TX29AD10C Quantity: 1
$4.99
» View Details
SLVM535GC/GK Quantity: 1
$4.99
» View Details
EHL20-4 CN Quantity: 1
$4.99
» View Details
SANTO.1855-6.KF.PLUS Quantity: 1
$4.99
» View Details
PB120 Quantity: 1
$4.99
» View Details
036.531 2/40611 Quantity: 1
$4.99
» View Details
PM2504 Quantity: 1
$4.99
» View Details
DMC-FZ10PL Quantity: 1
$4.99
» View Details
DU810SWPT2 Quantity: 1
$4.99
» View Details
HRJ491MS Quantity: 1
$4.99
» View Details
ECM-44BMP Quantity: 1
$4.99
» View Details
BS590DV Quantity: 1
$4.99
» View Details
ET14CCRWN00 Quantity: 1
$4.99
» View Details
MH1160XSQ4 Quantity: 1
$4.99
» View Details
CSW12CTP Quantity: 1
$4.99
» View Details
CA2751XSW2 Quantity: 1
$4.99
» View Details
KDA77 Quantity: 1
$4.99
» View Details
PCCI 802160 A Quantity: 1
$4.99
» View Details
PM3207 Quantity: 1
$4.99
» View Details
FSJ50/UC Quantity: 1
$4.99
» View Details
CU-2E18CBPG Quantity: 1
$4.99
» View Details
ARC3702 Quantity: 1
$4.99
» View Details
GLA5580XSG0 Quantity: 1
$4.99
» View Details
DRA365RD Quantity: 1
$4.99
» View Details
AWO/D 8830 Quantity: 1
$4.99
» View Details
AV2968TEE Quantity: 1
$4.99
» View Details
SCPT750 Quantity: 1
$4.99
» View Details
ZC 2551 Quantity: 1
$4.99
» View Details
TT21AKXKT03 Quantity: 1
$4.99
» View Details
3200 Quantity: 1
$4.99
» View Details
ART 608/G Quantity: 1
$4.99
» View Details
ACQ102XP0 Quantity: 1
$4.99
» View Details
TH-42PZ800U Quantity: 1
$4.99
» View Details
ADP 7962 WH Quantity: 1
$4.99
» View Details
D8438/02 Quantity: 1
$4.99
» View Details
ARC 7657/IX Quantity: 1
$4.99
» View Details
CAM2762TQ0 Quantity: 1
$4.99
» View Details
ADG 8502 WH Quantity: 1
$4.99
» View Details
AYX095E Quantity: 1
$4.99
» View Details
SXPV10 Quantity: 1
$4.99
» View Details
DM-DV5/XCN1/EW Quantity: 1
$4.99
» View Details
HR-XVC30US Quantity: 1
$4.99
» View Details
OD-3 Quantity: 1
$4.99
» View Details
RF0100XRW5 Quantity: 1
$4.99
» View Details
Subtotal: $384.23
 
English Polski Spanish 
Buscar un manual
 

(p.Ej. AA-V20EG JVC, ZX-7 Sony)
PayPal 1000+ rating Secure, Encrypted Checkout.
 
Productos
Información
Destacado
Inicio >> WHIRLPOOL >> GS6SHANLB10 Manual de Usuario
 
 77 artículo(s) en Su carrito 

WHIRLPOOL GS6SHANLB10
Manual de Usuario


¡Twitee acerca de este producto y obtenga $1.00 de crédito en la tienda para uso!
  • Descargable
  • Formato PDF
  • Manual completo
  • Idiomas: English
Precio: $4.99

Descripción del WHIRLPOOL GS6SHANLB10 Manual de Usuario

Manual del propietario completo en formato digital. El manual estará disponible para descarga como archivo PDF después de que lo compre.

El Manual del Propietario (a veces llamado Manual del Usuario o Guía del Usuario) contiene información sobre cómo utilizar su dispositivo. Después de colocar la orden le enviaremos las instrucciones de descarga a su dirección de e-mail.

The manual is available in languages: English

Not yet ready
You must purchase it first

Opiniones de los clientes
No hay comentarios de productos.

TEXT_PDF_SNIPPET
To dispense water:
1. Press a glass against the water dispenser lever. 2. Remove the glass to stop dispensing. NOTE: Dispense enough water every week to maintain a fresh supply.

After changing the water filter cartridge, reset the water filter status light by pressing the light switch 5 times within 10 seconds. The status light will change from red to green when the system is reset.

Non-indicator water filter (on some models)
If your refrigerator does not have the water filter status light, you should change the water filter cartridge every 6 to 9 months depending upon your usage. If the water flow to the water dispenser or ice maker decreases noticeably before 6 months have passed, replace the water filter cartridge more often.

Changing a base grille water filter cartridge The dispenser light
The dispenser area has a light. It can be turned on manually by pressing the ON button at the right-hand side of the control panel. The red indicator above the ON button will appear. On some models: Whenever you use the dispenser the lever will automatically turn the light on. The base grille water filter is located below the freezer compartment door. Depending on your model, you may have a filter that is located behind the base grille (Style 1) or a filter that is located through the base grille (Style 2). Style 1: Behind the base grille filter 1. Remove the base grille (see �Removing the base grille� section). Rotate the cartridge counterclockwise to a vertical position and pull the filter cartridge out. NOTE: There will be water in the cartridge. Some spilling may occur.

LIGHT
OFF ON

NOTE: See the �Changing the Light Bulbs� section for information on changing the dispenser light bulb. On models without crushed ice, the light switch is a rocker-style type. Push the switch to turn the light on, and push again to turn the light off.

The dispenser lock (on some models)
Your dispenser can be turned off for easy cleaning or to prevent accidental dispensing by small children and pets. To turn off the dispenser, press the LOCK button. The indicator will appear above the LOCK button and the ice and water dispensers will not work. To unlock the dispenser, press the UNLOCK button until the indicator appears. Then continue to dispense ice or water as usual.

DISPENSER
LOCK UNLOCK

2. Take the new cartridge out of its packaging and remove protective cover from o-rings. 3. Push the new filter cartridge into the base until it stops. Rotate the cartridge clockwise to a horizontal position. Flush the water system (see �Flushing the Water System after Replacing Filter� later in this section). Style 2: Through the base grille filter

NOTE: The lock feature does not shut off power to the product, to the ice maker, or to the dispenser light. It simply deactivates the dispenser levers.

Water Filtration System
(on some models)
The base grille water filter status light (on some models)
The water filter status light will help you know when to change your water filter cartridge. The light is located at the top of the refrigerator compartment. The light will change from green to yellow. This tells you that it is almost time to change the water filter cartridge (90% of the filter life has been used). It is recommended that you replace the base grille water filter cartridge when the water filter indicator light changes to red OR water flow to your water dispenser or ice maker decreases noticeably. (See �Changing a base grille water filter cartridge� later in this section.) NOTE: Do not use with water that is microbiologically unsafe or of unknown quality without adequate disinfection before or after the system.

1. Locate the water filter cartridge cap in the front base grille. Rotate the cap counterclockwise to a vertical position and pull the cap and filter cartridge out through the base grille. NOTE: There will be water in the cartridge. Some spilling may occur. 2. Remove the cartridge cap by sliding it off the end of the old cartridge. The cap will slide to the left or right. DO NOT DISCARD THE CAP .

3. Take the new cartridge out of its packaging and remove protective cover from o-rings.

1
1. Status Light 2. Light Switch

2
4. Slide the cartridge cap onto the new cartridge. See illustration in Step 2.

11

Quizás también quiera comprar

$4.99

GS6SHANLB10 WHIRLPOOL
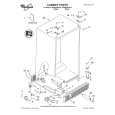
Catálogo de piezas

Únicamente Catálogo de Partes. Está disponible en formato PDF. Muy útil si su equipo se ha averi…
>
Parse Time: 1.252 - Number of Queries: 373 - Query Time: 0.766