No hay comentarios de productos.
3-264-412-11(1)
C
PC, CD or MD Walkman, etc.
Installing the satellite speakers
(See fig. A)
Use the supplied screws to attach the base to the satellite speaker. The satellite speaker can be used either placed on a desk or attached to a wall.
Troubleshooting
Should you encounter a problem with your speaker system, check the following list and take the indicated measures. If the problem persists, consult your nearest Sony dealer. � Make sure all the connections have been correctly made. � Make sure the VOLUME dial and the each speaker�s volume dial on the control box.
Active Speaker System
Operating Instructions Manual de instrucciones
When you use the satellite speaker on a desk (See fig. A-A)
By attaching the base to the satellite speaker, it can be placed on a desk.
There is no sound from the speaker system.
1
Match the hole of the base and the bottom hole of the satellite speaker.
Attach the base with the anchor holes facing forward. The base allows you to adjust the satellite speaker to the desired angle.
� Make sure the connected component has been turned up properly. � Check if headphones are connected. If they are, disconnect them.
The sound is distorted.
� Turn down the volume level on the connected component. Or, if the connected component has a BASS BOOST function, set it to off. � Rotate BASS on this unit to reduce the bass volume. � Turn VOLUME on this unit down to reduce the volume.
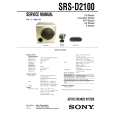
SRS-D2100
2
 2004 Sony Corporation
Printed in China
Ensure the screws are tight.
Tighten the screw with your finger. If it is difficult, use a screwdriver to secure the screw.
Subwoofer Front speaker (Left) Control box Front speaker (Right)
Owner�s Record
The model number and the serial number are located on the rear of the subwoofer. Record the model number and the serial number in the space provided below. Refer to them whenever you call upon your Sony dealer regarding this product. Model No. SRS-D2100 Serial No.
When you use the satellite speaker attached to a wall (See fig. A-B)
There is hum or noise in the speaker output.
� Make sure all the connections have been correctly made. � Make sure none of the audio components are positioned too close to the TV set.
By attaching the base to the satellite speaker, it can be attached to a wall. Follow the Notes (below) to install safely. Improper installation may result in the speaker falling and causing bodily injury or damage to the speaker or other object.
,
The sound has suddenly stopped.
Make sure all the connections have been correctly made.
1
Align the hole in the base with the hole at the rear of the satellite speaker.
Attach the base with the anchor holes uppermost. The base allows you to adjust the satellite speaker to the desired angle.
The brightness of the POWER indicator is unstable.
D
Package Contents
POWER
PHONES
The brightness of the POWER indicator may become unstable when the volume is turned up. This is not a malfunction.
2
OFF POWER
MIN MAX
Ensure the screws are tight.
Tighten the screw with your finger. If it is difficult, use a screwdriver to secure the screw.
Specifications
Speaker section
Satellite speaker
Speaker system Speaker units Enclosure type Impedance Cord length Full range, magnetically shielded 5.6 cm, cone type Closed type 6� 3m Woofer 16 cm, cone type Bass reflex 6�
ON PHONE BASS
Control box
VOLUME
3
VOLUME
Secure the hollow wall anchor in the wall � refer to the illustration. Notes
� Confirm wall thickness is sufficient. A minimum thickness of 9.5 mm is recommended for plasterboard. � Use the specified clamp (hollow wall anchor, not supplied) when attaching to plasterboard. � Refer to the supplied operating instructions using a hollow wall anchor. � Use wall anchors of at least 20 kg hanging capacity. � Refer to the instruction supplied with hollow
Subwoofer
Speaker system Speaker units Enclosure type Impedance
Subwoofer (1)
Control box (1)
Connecting Cable (1)
VOLUME: Controls total volume level. BASS: Adjusts bass level (Subwoofer) PHONE: Connect to headphones for personal listening
Amplifier section
Rated output 12 W (10% T.H.D., 1 kHz, 6 �) (Satellite speaker) 80 W (10% T.H.D., 100 Hz, 6 �) (Subwoofer) Stereo mini jack � 1 (INPUT 1) Stereo mini jack � 1 (INPUT 2) 4.7 k� (at 1 kHz) Stereo mini jack � 1 (PHONES) Approx. 130 � 40 � 73 mm (5 1/8 � 1 5/8 � 2 7/8 in.) (Control box) Approx. 95 � 135 � 150 mm (3 3/4 � 5 3/8 � 6 in.) (Satellite speaker, on a desk) Approx. 957�1/8 in.)180 mm speaker, (3 3/4 � 4 � 100 � (Satellite attached 285 � 285 � 462 mm Approx. to a wall) (11 1/4 � 11 1/4 � 18 1/4 in.) (Subwoofer) Mass Approx. 200 g (7 oz.) (Control box) Approx. 490 g (1 lb. 1 oz.) (Satellite speaker) Approx. 8.2 kg (18 lb. 1 oz.) (Subwoofer) 2 m (Control box to subwoofer) 2 m (Power cord) 31 W
Satellite speaker (2)
Base (2)
Screw (2)
English
Before operating the unit, please read this manual thoroughly and retain it for future reference.
On operation
A
A
Base
� Do not drive the speaker system with a continuous wattage exceeding the maximum input power of the system. � Before connecting, turn off the speaker system, the PC and audio component to avoid damaging the speaker system. � The volume level should not be turned up to the point of distortion. � Although this system is magnetically shielded, do not leave recorded tapes, watches, personal credit cards or floppy disks using magnetic coding in front of the system for an extended period of time.
wall anchor. � Requires ø 4 mm hollow wall anchor. � Set up the head of a hollow wall anchor 5 mm from the wall. � Apply a bond (anaerobic threadlocking material) to the hollow wall anchor to prevent the screw loosening.
Input Input impedance Output
General
Dimensions (w/h/d)
WARNING
Screw
4
Attach the satellite speaker to the wall.
Insert both wall anchors in the anchor holes of the satellite speaker base.
,
The speaker angle can be changed by attaching the base back to front.
Satellite speaker
Attach the base with the anchor holes facing forward Attach the base with the anchor holes uppermost Anchor holes
To prevent fire or shock hazard, do not expose the unit to rain or moisture. To avoid electrical shock, do not open the cabinet. Refer servicing to qualified personnel only. To prevent fire, do not cover the ventilation of the apparatus with news papers, table-cloths, curtains, etc. Do not place lighted candles on the apparatus. To prevent fire or shock hazard, do not place objects filled with liquids, such as vases, on the apparatus. Do not install the appliance in a confined space, such as a bookcase or built-in cabinet.
Note
Ensure that the satellite speaker is securely attached to the wall before use.
If the TV picture or monitor display is magnetically distorted
Although this system is magnetically shielded, there may be cases that the picture on some TV sets/personal computers may become magnetically distorted. In such a case, turn off the power of the TV set/personal computer once, and after 15 to 30 minutes turn it on again. In the case of a personal computer, take appropriate measures, such as data storage, before turning it off. When there seems to be no improvement, locate the system farther away from the TV set/personal computer. Furthermore, be sure not to place objects in which magnets are attached or used near the TV set/ personal computer, such as audio racks, TV stands, toys etc. These may cause magnetic distortion to the picture due to their interaction with the system.
Hooking up the system
(See fig. B)
B
CAUTION
Hollow wall anchors (ø 4 mm, not supplied)
You are cautioned that any changes or modification not expressly approved in this manual could void your authority to operate this equipment.
Cord length
1
Connect the cord of the control box to the 8-pin Din jack of the subwoofer with their respective arrows aligned. Connect the satellite speakers to the subwoofer.
Confirm the location of the satellite speakers, and then connect to their respective jacks.
Power consumptions
Supplied accessories
Connecting Cable
,
Satellite speaker Base Screw 40 mm
NOTICE FOR THE CUSTOMERS IN THE USA
2
Optional accessories
Connecting cord RK-G136, RK-G138 Plug adaptor PC-236MS
3
Connect the control box to the source equipment.
� PC, etc.: Connect the INPUT1 jacks of the control box and the LINE OUT or headphones jack of a PC, etc. with the supplied connecting cord. For details, refer to the operating instructions of the PC. � CD/MD Walkman, etc.: Connect the INPUT2 jack of the control box and the LINE OUT or headphones jack of a CD/MD Walkman, etc. The connecting cord is not supplied with this system.
Design and specifications are subject to change without notice.
On placement
� Do not set the speakers in an inclined position. � Do not leave the system in a location near heat sources, or in a place subject to direct sunlight, excessive dust, moisture, rain or mechanical shock. � Do not install the satellite speaker anywhere other than on a wall. � Do not hang on the satellite speaker or hang anything on it.
Note
First, be sure to apply a bond (anaerobic threadlocking material) to the hollow wall anchor to prevent the screw loosening.
5 mm 7 mm ø 4 mm
This symbol is intended to alert the user to the presence of uninsulated �dangerous voltage� within the product�s enclosure that may be of sufficient magnitude to constitute a risk of electric shock to persons. This symbol is intended to alert the user to the presence of important operating and maintenance (servicing) instructions in the literature accompanying the appliance.
On cleaning
Do not use alcohol, benzene, or thinner to clean the cabinet. If you have any questions or problems concerning your speaker system, please consult your nearest Sony dealer.
Note
To switch INPUT1 and INPUT2, use ON/OFF of the device connected to the control box.
4 5
Note 9.5 mm or more
Do not hang on the satellite speaker or hang anything on it.
Connect the subwoofer to the wall outlet. Position the speakers. (See fig. C)
Precautions
On safety
The nameplate indicating operating voltage, power consumption, etc., is located on the rear exterior. � Before operating the system, be sure that the operating voltage of the system is identical with that of your local power supply.
B
Connecting cord (not supplied) to INPUT2 jack Control Box (rear) to INPUT1 jack to 8-pin Din jack Connecting Cable (supplied) to LINE OUT or headphones jack Satellite speaker (rear) PC, etc. to LINE OUT or headphones jack (stereo mini-jack) CD/MD Walkman*, etc
Listening to the sound (See fig. D)
First, turn down the volume on the control box. The volume should be set to minimum before you begin playing the programme source.
Where purchased U.S.A./Canada European countries Other countries
Operating voltage 120 V AC, 60 Hz 220 � 230 V AC, 50 Hz � 110 � 120 V AC, 50/60 Hz � 220 � 230 V AC, 50 Hz
1 2
Set the POWER switch to ON on the control box.
The POWER indicator lights up.
� The unit is not disconnected from the AC power source (mains) as long as it is connected to the wall outlet, even if the unit itself has been turned off. � Unplug the system from the wall outlet if it is not to be used for an extended period of time. To disconnect the cord, pull the cord by grasping the plug. Never pull the cord itself. � Should any liquid or solid object fall into the system, unplug the system�s power cord and have the system checked by qualified personnel before operating it any further. � The AC power cord should be changed only at a qualified service shop. � For efficient heat dissipation, ensure there is sufficient space to the rear of the subwoofer. Also, avoid placing objects on the unit. � Do not insert your hand or any objects into the hole of the subwoofer.
Adjust the VOLUME control on the control box.
You can adjust the volume of the subwoofer and each satellite speaker. When connecting to the headphone output, also adjust the volume of the connected component. After listening, set the POWER switch to OFF. The POWER indicator goes off.
3
Using headphones/earphones.
Connect headphones/earphones to the PHONES jack on the control box.
Note
Turn off the MEGA BASS or BASS BOOST (Walkman, etc.) function as it may cause audible distortion.
to Front R jack Subwoofer (rear)
to Front L jack * �WALKMAN� is a registered trademark of Sony Corporation to represent Headphone Stereo products.
to wall outlet