|
|
|
Productos
|
|
Información
|
|
Destacado
|
|
|
 |
|
|
No hay comentarios de productos.
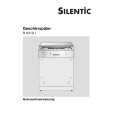
5.2
TAKE OUT CASSETTE TAPE
The following procedure is a method for taking out the cassette tape in case the cassette tape cannot be ejected due to an electrical failure. The following procedure is a simplified method; therefore, for more reliable operation, it is recommended that you should remove exterior parts so that you can take out the tape without excessive force. (1) Remove the Power Unit (battery or DC cord) from the set. (2) Open the CASSETTE COVER till it is completely opened and fixed. (3) Attach a PVC tape as shown in the figure. NOTE: Be careful of cassette tape damage caused because the Cassette Housing Assembly is moved upward at the unloading end (Eject mode). (4) To set the Slide Deck Assembly to the unloading end, apply DC 3V to the electrode (terminal) on the top surface of the LOADING MOTOR that is seen through a space of VF side. NOTE: Be careful not to attach grease or a similar substance to the surface of the cassette tape on the tape transport system. (5) Wind the cassette tape by directly turning the Reel Disk Assembly (SUP) from the backside of the SLIDE DECK ASSEMBLY by using a sharp tool (Chip IC replacement tool). (6) Confirm that the cassette tape is completely wound, and then peel off the PVC tape from the CASSETTE HOUSING ASSEMBLY and take out the cassette tape. NOTE: To confirm that the cassette tape is completely wound, confirm that one REEL DISK ASSEMBLY (TU) rotates as you rotate the other REEL DISK ASSEMBLY (SUP). (7) Make sure that grease or a similar substance is not attached to the surface of the tape taken out in the procedure (6). Similarly, also make sure that grease or a similar substance is not attached on the MECHANISM ASSEMBLY, especially the tape transport system.
(DC3V)
CASSETTE COVER
TAPE
LOADING MOTOR ASSEMBLY
CASSETTE HOUSING ASSEMBLY
REEL DISK ASSEMBLY (SUP) SLIDE DECK ASSEMBLY
Fig.5-2-1
(No.YF031)1-19
|
|
|
> |
|