No hay comentarios de productos.
4-664-608-11(1)
Capabilities
Wireless access to the Internet from a variety of locations
The Wireless LAN Access Point PCWA-A220 (hereafter referred to as the Access Point) is an IEEE 802.11b-compliant bridge-type 2.4 GHz wireless LAN access point. You can use the Access Point as a base station to construct a wireless LAN environment with computers that contain a wireless LAN PC card.
Procedures to Installing, Connecting, and Setting Up
Installing the Access Point
Procedure 1 Procedure 2 Preparation
Verify your computer's configuration and connection type.
Adjust your computer�s firewall settings
If you are using the Windows XP Internet Connection Firewall or a personal firewall function provided by virus scanning software, it may be necessary to adjust the security level setting. Refer to the note found at the end of this manual on �Computer Firewall Functions.�
Procedure 2
Install the Access Point
Installation
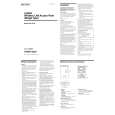
2.4GHz Wireless LAN Access Point (Bridge Type)
Quick Start Guide
Before reading this guide, be sure to read the supplement entitled �Read This First.� This guide provides an overview of the functions of the 2.4GHz Wireless LAN Access Point PCWA-A220, and explains the preparations that are necessary before the Access Point can be put into operation.
If you want to enable the computers that are connected to the wireless LAN to access the Internet, simply connect the Access Point to a DSL modem, cable modem, ISDN router, broadband router or another similar communication device, or to an Ethernet LAN (wired LAN) that is connected to the Internet. Notes
Install the Access Point
Install the Access Point in a stable location where it will not tip over or fall. Notes
� Install the Access Point on a stable surface. � Do not install it on a shelf or other place where jarring or vibration might cause it to fall. � Do not install the Access Point in any location where passers-by might accidentally come in contact with the Access Point or its cabling. � When installing the Access Point, be sure to read the �Read This First� supplement as well.
� Use an Ethernet cable to connect the Access Point to the communication device. You cannot use a USB connection to connect the Access Point to a communication device. � To set up the Access Point, there must be two or more available IP addresses in the network where the Access Point is connected.
Install the Access Point, connect it to a DSL modem, cable modem, ISDN router, or broadband router, or to an Ethernet LAN, and then turn the power on.
Connection sample 1:
If you hang the Access Point on a Wall...
Establishing a Wireless Connection
Internet
Procedure 3 Establish communication between the computer and the Access Point
You can use the mounting holes on the bottom of the access point to hang the Access Point on screws or nails in a wall. There are no mounting brackets provided with the Access Point. Use sturdy screws or nails that will be able to bear the weight of the Access Point. s Recommended screws � Roundhead screws (shaft diameter 0.13 inch (3.1 mm)) � Flathead screws (shaft diameter 0.13 inch (3.1 mm))
Configure wireless communication settings for your computer, and establish wireless communication with the Access Point under the default settings. Although communication is possible under the default settings, from a security standpoint it is best to also perform the following procedures and change the default settings.
DSL modem or cable modem
Hub
�0.23 (5.7)
Configuring the Access Point
Procedure 4
DSL broadband: Should have separate account and install the DSL dialup software (PPPoE) on each computer or obtain each IP address for each computer. � Contact your DSL provider to obtain additional account/information.
�0.13 (3.1) 0.1 (2.3)
unit: inch (mm)
�0.25 (6.2)
�0.13 (3.1) 0.08 (1.8)
Install the utility software
Notes
� Using two screws or other fasteners, ensure that the Access Point is securely set on the wall. When fastening the Access Point to a wall with screws, retighten them after mounting the Access Point. � Select a location that will hold the weight of the Access Point when mounting it on the wall. If the location cannot hold the weight of the Access Point, the Access Point may drop and cause an accident. � When mounting the Access Point on walls made of plasterboard or other fragile material, make sure that the material is strong enough to support the unit�s weight and use special screw fasteners or other fixtures that are made for use with that material. If the unit is fastened with ordinary screws, there is a danger that it may fall. � When mounting the Access Point on the wall, be careful not to drop the Access Point or the tools used for doing the work. Dropping the unit or tools could result in unforeseeable accidents.
Use the CD-ROM provided to install the utility software that searches for the Access Point.
PCWA-A220
Sony Corporation ©2002 Printed in Japan
Cable modem broadband: Should have each specific IP address for each computer. � Contact your cable modem provider to obtain additional IP addresses/information.
Procedure 5
Change the Access Point settings
Use the newly installed utility software to change the Access Point settings.
Connection sample 2:
Procedure 6 Change the computer settings
Change the computer's wireless communication settings in accordance with the new Access Point settings that were changed in procedure 5.
Unpacking
Once you have unpacked the unit, make sure that all of the following items are present: � Access Point � AC adapter
Internet
Approx. 2.1 inches (54 mm)
z Hint
DSL/cable router DSL modem or cable modem
In this guide, each procedure is preceded by a check box. After you complete each procedure, confirm that you have performed all of the necessary tasks described in that procedure, and then check off the check box before proceeding to the next procedure. Example:
Approx. 0.12 inch (3 mm)
Procedure 1
Installing the Access Point
DSL or cable modem broadband: Would work with only one DSL (Except AOL-DSL) or cable modem broadband account. � Contact your broadband provider to obtain correct information and IP address. � Power cord (gray) � Proper settings and connecting to DSL or cable modem broadband in DSL/cable modem router. Complete the following preparations before setting up the Access Point.
Connecting to a DSL modem, cable modem, ISDN router, or broadband router, or to an Ethernet LAN
1
Procedure 1
Connect your DSL modem, cable modem, ISDN router, broadband router or an Ethernet LAN hub to the NETWORK connector on the Access Point using an Ethernet cable as shown below.
Note
Make the connection using either a straight-through or a cross-over Ethernet cable. Use the same type of cable as when connecting a communication device directly to the computer. For details on what cable to use, refer to the instruction manual for the communication device that you are using. If you are connecting the Access Point to an Ethernet LAN hub, use a straight-through Ethernet cable. (The supplied Ethernet cable is a straight-through cable.)
Preparation
Connection sample 3:
� Ethernet cable (straight-through) � CD-ROM (Setup disc) � Read This First � Quick Start Guide (this manual) � Troubleshooting Guide � Limited Warranty � One set of printed materials
Set up your wireless LAN PC card.
Install the wireless LAN PC card in the computer, and then install any device drivers and utility software that are necessary in order to use the wireless LAN PC card. For details, refer to the instruction manual provided with the wireless LAN PC card.
Internet
z Hint
Also see the connection examples outlined in �Capabilities.�
Confirm the method to be used for making the wireless connection between your computer and the Access Point.
Confirm the method to be used for making the wireless connection between the computer in which the PC card is installed and the Access Point. For details, refer to the instruction manual provided with the wireless LAN PC card. (Specific settings are explained in procedure 3.) DSL modem or cable modem
DSL or cable modem broadband (on computer): � Install the DSL dialup software (DSL-PPPoE) or setting correct IP address (cable modem) on
� Microsoft and Windows are registered trademarks of Microsoft Corporation in the U.S. and in other countries. � In this manual, the term �Windows XP� is used to refer to both Microsoft Windows XP Home Edition and Microsoft Windows XP Professional. � Ethernet is a registered trademark of Fuji Xerox. � Netscape and Netscape Communicator are trademarks or registered trademarks of Netscape Communications Corporation. � Other system names and product names that appear in this manual are registered trademarks or trademarks of their respective owners. Note that the � and ® symbols are not used in this manual.
Confirm the method to be used for connecting the Access Point to the DSL modem, cable modem, ISDN router, or broadband router, or to an Ethernet LAN.
Make the connection using either a straight or a crossed Ethernet cable. When connecting to a communication device, use the same type of cable as when connecting the communication device directly to the computer. Ethernet cable
computer. � Straight-through Ethernet cable.
z Hints
� For details on the type of cable to use when connecting the Access Point to a communication device, refer to the instruction manual for the communication device. � The Ethernet cable that is provided with the Access Point is a straight-through cable. If a cross-over cable is needed, you must obtain it separately. � To set up the Access Point, there must be two or more available IP addresses in the network where the Access Point is connected.
Continued on next page