|
|
|
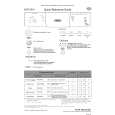
Productos
|
|
Información
|
|
Destacado
|
|
|
 |
|
|
No hay comentarios de productos.
MEX-R5 SECTION 4 ELECTRICAL ADJUSTMENTS
SERVO SECTION
If any of the following parts was replaced, perform the �IOP Check� and �E, F Signal Offset Adjustment� as mentioned below.
SERVO board
Ver. 1.1
E, F SIGNAL OFFSET ADJUSTMENTS
Connection:
oscilloscope (DC range)
Adjustments Location:
� Optical pick-up block (chassis (OP-DVD) complete assy or chassis (OP-DVD) sub assy) � Mounted SERVO board � SERVO board: IC4 R29, R30, R40, R41, R43, R44 R53, R54, R57, R58, R65, R69 RV1, RV2 Precaution Use the following tools and measuring devices. � Extension jig (Part No. : J-2502-094-1) between the SERVO board and the MAIN board � DVD test disc TDV-540C (Part No. : 7-819-098-53) � CD test disc PATD-012 (Part No. : 4-225-203-01) � Digital voltmeter � Oscilloscope � Accessory remote commander RM-X702 (E, Chinese model) RM-X703 (AEP, UK, Russian models) RM-X704 (US, Canadian models)
TP (E), TP (F) TP (AGND)
+ �
� SERVO Board (Side B) �
Procedure: 1. Connect an oscilloscope to TP (E) and TP (AGND) on the SERVO board. 2. In the standby status, press the [4] key of the remote commander. 3. Press the [5] key of the remote commander. 4. Press the [7] key of the remote commander for more than two seconds. 5. When the test mode is selected, a peep sound is generated and the LCD display becomes 6-digit hexadecimal number indication. (*1) 6. Playback the CD test disc (PATD-012). 7. Press the P key of the remote commander. 8. Adjust the RV2 on the SERVO board so that waveform level of oscilloscope becomes between 2.75 and 2.80 V as follows.
E Signal Waveform:
RV2 E Signal Offset Adjustment TP (IOPCD) TP (IOPDVD) TP (AGND) TP (F) TP (A5V)
TP (E)
RV1 F Signal Offset Adjustment
IOP CHECK
Connection:
digital voltmeter SERVO board TP (IOPDVD), TP (IOPCD) TP (A5V) + �
0V level: 2.75 to 2.80 Vp-p
9. Connect an oscilloscope to TP (F) and TP (AGND) on the SERVO board. 10. Adjust the RV1 on the SERVO board so that waveform level of oscilloscope becomes between 2.75 and 2.80 V as follows.
F Signal Waveform:
Procedure: 1. Check the IOP value of DVD and CD by label on the optical pick-up.
Optical Pick-up Label:
KHS-340B ******* $$$###
CD IOP value DVD IOP value
0V level: 2.75 to 2.80 Vp-p
2. Connect a digital voltmeter to TP (IOPDVD) and TP (A5V) on the SERVO board. 3. Playback the DVD test disc (TDV-540C), and make a note of the value of digital voltmeter. 4. Divide the measured voltage value by 16.5, and convert it into current value. 5. Check that the calculated value is within ±6 mA to the IOP value given on the label. 6. Connect a digital voltmeter to TP (IOPCD) and TP (A5V) on the SERVO board. 7. Playback the CD test disc (PATD-012), and make a note of the value of digital voltmeter. 8. Divide the measured voltage value by 16.5, and convert it into current value. 9. Check that the calculated value is within ±6 mA to the IOP value given on the label.
11. Press the [RESET] button on the MAIN board, release the test mode.
*1) In the TEST mode, if any abnormality occurred in the operation, for instance, by pressing a wrong key, press the [RESET] button on the MAIN board to reset the operation once, and then retry the operation.
MEX-R5
19
19
|
|
|
> |
|