|
|
|
Productos
|
|
Información
|
|
Destacado
|
|
|
 |
|
|
No hay comentarios de productos.
_ _ !i___ '_¸! :i 'i_i ii ii_: _ _ '¸ OVEN _R
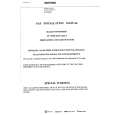
Proportionalvalves have an adjustingscrew located insidethe valve stem. Valvesthat do not have this screw can not be adjusted, The LO setting should produce a stable flame when turning the knob from HI to LO. On conventional surface burners, the flame should be 1/8-inchtall or lower and must be stable on all ports on LO setting. For sealed surface burners, the flame should extendto the outer edge of the lip on the burner cap on the LO setting, To adjust: Operate burner on HI for about 5 minutesto preheat the burner cap. Turn the knob back to LO; remove knob, and insert a small screwdriverinto the center of the valve stem. Adjust the flame size by turning the adjustment screwin either direction,
:
::
Do not place excessiveweight on an open oven dooror stand on an open oven door as, in some cases, it could cause the range to tip over, break the door or cause serious injury to the user. When opening the oven door, allow steam and hot air to escape before reaching into the oven to check, add or remove food. Do not attemptto open or close the door until the door i., completely seated on the hinge arms. Never turn on the oven unless the door is properly in place. When baking, be certain the door is completely closed. Baking results will be affected if the door is not securely closed. CAUTION: Hinge arms are spring mounted and will slam shut against the range if accidently hit. Never place hand or fingers betweenthe hinges and the front oven frame. You could be injured if hinge snap_ back. To remove"stop"position doorto the lift-off door: When the door is cool, open th (openedabout6 inches)and graspthe door at each side.Do notusethe doorhandle to liftthe door.Liftup evenlyuntilthe doorclearsthe hingearms.
The flame must be of sufficientsize to be stable on all burner ports.If the flame adjustment is needed,adjust ONLYon the LO setting. Never adjust flame size on a higher setting.
I__
O_
_INDOW, if_i
....
To replacedoor: Graspthe doorat each side,alignthe slots in the doorwith the hinge arms and slide the door down onto the hinge arms until it is completely seated or the hinges.
To protect the oven door window: 1. Do not use abrasive cleaningagents such as steel wool scouring pads or powdered cleansersas they may scratchthe glass, 2. Do not hit the glass with pots, pans, furniture, toys, or other objects. 3. Do notclosetheovendooruntiltheoven racks are in place, Scratching,hitting,jarring or an increasedrisk of weaken its structure causingstressingthe glassmay breakage at a later date.
O_N
LIGHT, if_Ui_ ed
Beforereplacingthe lightbulb,DISCONNECTPOWER TO THE RANGE.Be sure the bulbis cool.Do not touch hot bulbwith a dampclothas the bulbmay break. To turn on oven light: Push_ in the rocker switch located / on the backguard manifold panel. or on the _ ," IIFi'LJ .... f_
To replace oven light: Be sure the bulb is cool. Use a dry potholder,to prevent possible harm to hands,and very carefully unscrew bulb. Replace with a 40 watt appliance bulb and reconnect powerto the range. Resetthe clock.
|
|
|
> |
|